POWER APPS AND SHAREPOINT IS AN IMMENSELY POWERFUL COMBINATION that allows you to construct time-saving automated applications that will save your colleagues valuable time when following business processes. But you knew that already, right?
I was recently working on a business process that required the Requestor choose an Approver from a list of authorised Approvers. Each area of the business had a different set of Approvers, and I wanted to make sure that the Requestor wasn't able to select the wrong Approver for their business area.
What's the problem, I hear you shout. Just whack in a ComboBox or a DropDown and off you go ... and, in truth, that's how I first approached the problem.
In addition to the main list which would hold the requests ("FAC") I created a lookup list ("FAClob") with two columns - a simple text column (I just used the existing Title column) to hold the Line of Business values and Person or group column to hold the corresponding Authorisers.
 |
| Here's the lookup list. Normally, I'd order by the Title column, but here I've ordered by the Underwriter column to show that the Title column contains an assortment of duplicate values. |
I did then try to integrate the lookup list into the main list by adding a lookup column and pointing it at my LoB/Authorisers lookup list ... but quickly realised that was not the right approach. Far better to handle the looking up in the actual Canvas App that will handle the Requestors' submissions to the main list. So I deleted lookup column in the main FAC list and instead added a simple text field for the Line of Business and a Person or group field for the Authoriser.
 |
| Here's the corresponding columns in the main FAC list. |
So next I switched over to Power Apps, refreshed the DataSources to ensure that my app was looking at the latest versions of the lists, then set about adding the two new FAC fields to the New Form I was working on ...
 |
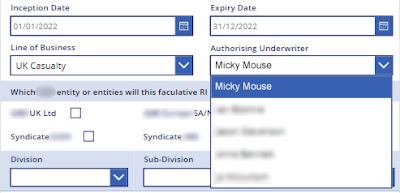
| Here's the new fields with the dropdowns already in place. |
With the fields in place in the Canvas App Form, I then set up the Line of Business DataCard. I added a DropDown to the DataCard and renamed it ddLoB. Then, switched to Advanced in the dropdown's Property panel and set the Items value to:
ddLoB.Items = Distinct(FAClob,Title)
and
ddLoB.Value = Result
 |
| You can leave the pane's Default value as "1", the Defaults default value, as changing it doesn't seem to do anything. |
The "Distinct" ensures that we only display one of each of the LoB values from the lookup list.
Next, we need to set up the DataCard by editing a couple of fields in the DataCard's Advanced Properties pane ...
 |
| We need the single quotes around '1-LoB' because it contains a hyphen. |
The default value should already be set to ThisItem.'1-LoB' (the single quotes are needed because I called my SharePoint List column 1-LoB, denoting this is a field for Form 1 in the process), but we have to change the Update value to:
1-LoB_DataCard1.Update = ddLoB.SelectedText.Value
Right ... that's the Line of Business field taken care of. Next, the Authoriser field.
What I need to do here is to make sure that when a requestor selects a Line of Business from the dropdown, the choice of authoriser is limited to the corresponding names from the lookup list. So I added a dropdown ("ddAUW") to the Authorisers DataCard and set these fields in the Properties/Advanced window ...
ddAUW.Items = Distinct(Filter(FAClob,Title = ddLoB.SelectedText.Value),Underwriter.DisplayName)
ddAUW.Value = Result
 |
The Authorisers dropdown's Items formula is a little more complicated because a Person or Group field holds a table rather than a single value, and we have to tell the dropdown which part of the table to return.
Then I turned my attention to the Update value in the DataCard ... and initially I fell into the trap of thinking I could just update the SharePoint list with a value from the Authoriser dropdown. Like this:
1-AuthorisingUW_DataCard1.Update = ddAUW.Result
I was just using a submit button to send the form's values to the SharePoint list, with the simple command:
Submit_Button.OnSelect = Submit(Form1)
But, of course, it didn't work. And, of course, it couldn't be as simple as that, could it?
So I asked my colleague Ernani if he had any idea what was going on. He suggested switching out the simple Submit button for a patch function, and even went to the trouble of writing the patch formula for me ... which was great, and it worked. But I like simplicity, and I felt that as I developed the forms needed for the whole application, having complex patches instead of simple Submits might become an albatross around my neck.
So, I wondered if I could take the section of the patch formula that sends the Authoriser details to the SharePoint list and instead pasted that code into the DataCard's Update action, that might serve the same function, while still allowing me to use a simple submit button. Here's the formula:
{
'@odata.type': "#Microsoft.Azure.Connectors.SharePoint.SPListExpandedUser",
Claims: "i:0#.f|membership|" & LookUp(
FAClob,
Underwriter.DisplayName = ddAUW.SelectedText.Value,
Underwriter.Email
),
DisplayName: "",
Email: LookUp(
FAClob,
Underwriter.DisplayName = ddAUW.SelectedText.Value,
Underwriter.Email
)
}
And here's what it looks like in place:
 |
| This is what the Advanced properties looks like after adding the formula. |
Then I just checked that the Default value of the DataCard was:
1-AuthorisingUW_DataCard1.Default = ThisItem.'1-AuthorisingUW'
And you know what? When I tested it, it worked!
There's a lot more to this particular form than what I've outlined above, but for me, the key breakthrough was the updating of the SharePoint Person and Group field from a Power Apps dropdown.
I hope this helps someone.


